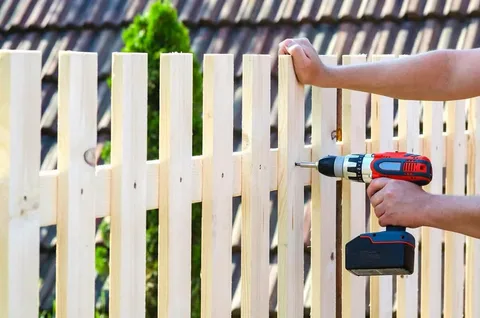
Wood fences provide excellent privacy and a classic look that enhances your property’s appearance. To ensure a smooth installation, plan your wood fence, measure and mark the fence posts, dig the post holes, and set the fence posts in concrete. After that, attach the rails to fence posts, secure the fence pickets, attach post caps, and seal the fence. If you’re not confident in handling these steps, consider hiring a professional wood fence installer for the best results.
Step-by-Step Guide to Installing a Wood Fence
Follow these easy steps to install a wood fence perfectly:
Step 1. Plan Your Wood Fence
Proper planning is the key to a successful fence installation. Here are some tips that you can follow to make clear decisions:
-
Determine the Purpose: Consider the purpose of your fence—whether for privacy, aesthetics, or security—as this will influence the material, height, and design.
-
Select Materials: Choose wood types that best suit your needs and budget. Cedar resists rot, pine is budget-friendly, and redwood offers durability.
Step 2. Measure and Mark the Location of Fence Posts
Accurate measurements ensure a sturdy fence. Use stakes and string to outline the fence line before marking post locations.
-
Take Measurements: First, use a measuring tape to measure the perimeter of the fencing area. Then, mark the spot for each post to ensure accuracy throughout the installation process.
-
Mark the Corners: Mark the corners where the fence will change direction. You should ensure the posts are straight using a string or chalk line. The spacing between posts could be 6 to 8 feet, but this can vary depending on your fence style.
Step 3. Dig the Post Holes
Once post locations are marked, dig holes to create a stable foundation for your fence.
-
Dig the Holes: Dig the holes to about 2-3 feet deep, usually one-third of the post’s total height. Deeper holes will provide better support. Moreover, you can keep the holes 6-8 inches wide for the post and concrete.
-
Check for Utilities: Check with local utilities before digging to ensure you do not hit underground lines.
Step 4. Set the Fence Posts in Concrete
To make a strong foundation and secure structure, you should set posts in concrete at the right depth. Here’s how you can do that:
-
Prepare the Concrete: Mix quick-drying cement with water according to the recommended manufacturer’s instructions.
-
Set the Posts: Have someone hold the post steady while you pour the mixed cement into the hole.
-
Wait for the Concrete to Set: Depending on the weather conditions, you should wait 12 to 24 hours for the concrete to dry completely.
Step 5. Attach the Rails to Fence Posts
After that, you can mark and connect the rails to fencing posts using proper techniques. This step requires precision, so take your time.
-
Mark Rail Positions: Use a measuring tape, chalk plumb line, and level to mark the upper and lower rail bracket positions on each fence post.
-
Attach Rail Brackets: Attach brackets to fence posts using screws, bolts, or fasteners. You can hold support rails against the brackets to check proper fit.
-
Install Support Rails: Place rails into the brackets and secure them with screws. Start with the bottom rail, then install the top rail. Tighten all screws to ensure the support rails are stable.
Step 6: Secure the Fence Pickets
Attach the fence pickets with proper spacing and alignment to ensure a professional and visually appealing finish.
-
Set a Plumb Line: Use a plumb line to maintain consistent picket height and adjust for terrain.
-
Attach Pickets: Position each picket straight and trim if necessary. You can secure them with screws into the rails.
Step 7: Attach the Fence Post Caps
After that, set post caps to protect your fence from weather damage and maintain a refined look. Here’s how you can attach them:
-
Clean Post Tops: Wipe post tops with a damp cloth to remove dirt or debris.
-
Apply Caulk: Use silicone caulk around the top to prevent moisture damage.
-
Secure Post Caps: Press the caps onto the posts and secure them with adhesive or screws.
Step 8: Seal the Fence
Finally, it’s time to seal the fence to protect it properly. To do this:
-
Choose the Right Product: Select a suitable sealer for long-term durability and aesthetic appeal.
-
Prepare the Fence: Clean the fence with a pressure washer or a mixture of soap and water.
-
Apply the Sealer: Use a brush or roller to apply the sealer from top to bottom.
Read More: How to Maintain Your Iron Fence After Installation
Wrap Up
Wood fences offer a great option for enhanced durability, privacy, and curb appeal for your property. To install a wood fence, you can start by planning your wood fence, marking the location of fence posts, and digging the post holes. Next, set the fence posts in concrete, attach the rails to the fence posts, and secure the fence pickets. To avoid weather damage, attach post caps and seal the fence for a clean finish. If you’re unsure about the installation, hire a reputable wood fence installer for professional results.


